Prologue
Late in 2019, we (the world) found ourselves in the grip of a Type III emergency. A strange illness was making its way around the globe, toilet paper became currency, and information changed forever. I was, like so many others, utterly dependent on the grid, woefully unable to describe what the internet even is, and reliant on on the inter-connectivity we’ve come to take for granted.
in 2021, in the aftermath of Hurricane Ida, there was an inability not only to collect information, but to adequately disseminate it… especially without the grid. This put the final punctuation on the need for a low power consumption computing platform that could fulfill the role of a TOC (tactical operations center) for planning during emergencies. I talked with Bear, who had been part of (now disgraced) HASF and its missions to Iraq, where he had acted as their network specialist for Humanitarian Aid Missions to discuss his experiences with fielding tech in austere environments. The directions he pointed me in would take a variety of shapes, and evolve with my knowledge base, awareness of available resources, and of course – lessons learned through error.
Part I: Components and Reasoning
Before discussing the why of what the mTOC has become, I want to talk about where it started and what it was. This informs its evolution. Given that literally anyone with a 3d printer, a Raspberry Pi, and an Amazon account can start on a project like this, and having taken this approach, I can tell you the path is a minefield of small adjustments that will test your sanity and resolve. While there are a number of great templates to start with, all of them fell a little short of what I’d hoped to accomplish. So let’s start with a side by side comparison, and move on to the components.
| Feature | mTOC | Prototype Build | Reason for change |
| Single Board | Raspberry Pi 4 4GB | Raspberry Pi 4 4GB | No change – this is a good fit for the project. |
| Power Supply | SunFounder PiPower Raspberry Pi UPS | None | Onboard power ensures a reliable, consistent 5.5V power source, and the ability to use the unit without an external power supply. |
| 4G Top Hat | Waveshare SIM7600 | None | The original device relied on an external router, whereas the mTOC uses a SIM card driven 4G Wi-Fi top hat to generate it’s own 4G off cellular. |
| RTL-SDR (or equivalent) | Nooelec Mini 2+ /RTL-SDR / HackRF | All of these are supported with either model | |
| Keyboard | MCSaite Super Mini Wired Keyboard | Acoucou Folding Keyboard/track pad | The built-in keyboard has better security, and the track pad is optional with a touchscreen. |
| Mouse | Perixx PERI-PAD Trackpad | Folding Keyboard/trackpad | |
| Case | Pelican 1300 (Check eBay for deals!) | Pelican 1150 | The larger case provides more space, and a better platform for a more capable assembly. This means no drilling, and water/shock proofing. |
| USB Hub | USB 2.0 4 port (out of production) Alternative | Anker 65W PowerPort ATOM III | The older 65W port was necessary because there was no onboard power, OR, the unit was connected to the grid. |
| Network Switch | NetGear 5 port Unmanaged Switch | None | |
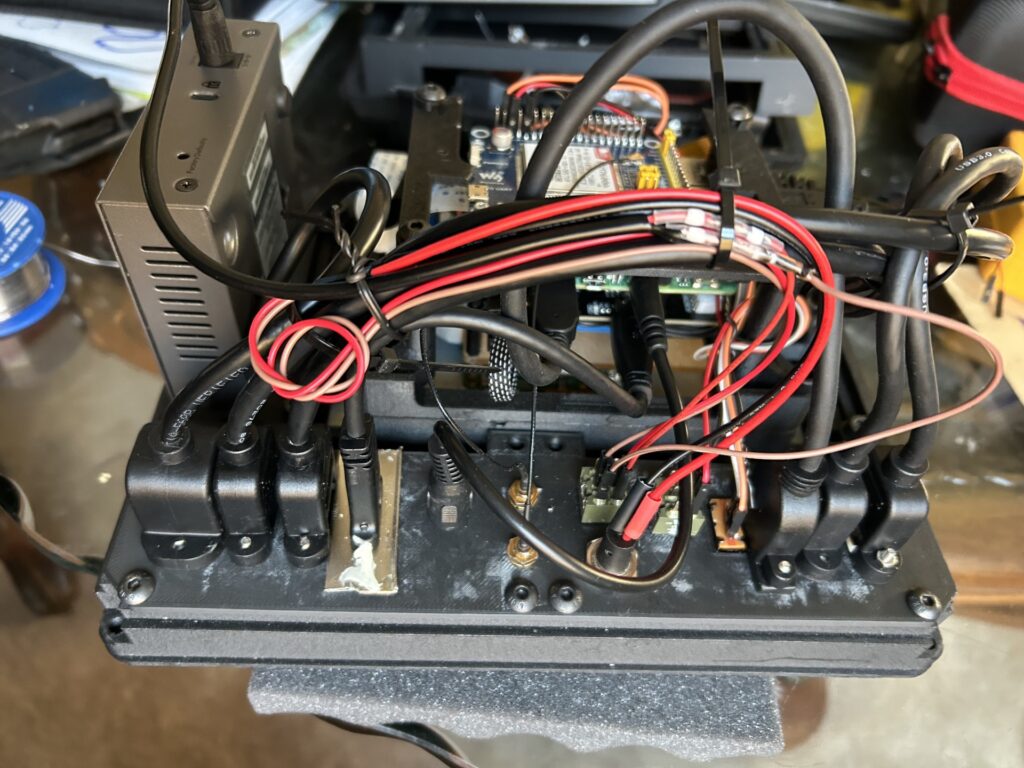
| Wiring | Mountable cables: – 1’ Right USB – 1’ Straight USB – 5.5x25mm Power (Switch) – 1’ HDMI – 1’ USB-C (power) – TRS 3.5mm Audio – RoHS UIM Sim cable Extension – UCTronics MicroSD Extender – Ethernet (RJ45) extension | None | While the lack of wiring simplified the original device, it left all wiring exposed and unorganized. Routing the Pi’s features to a chassis and faceplate allows the user to only use the wires they need at any given time, while keeping the unit self-contained and protected within the Pelican case. |
If you’re here for the pictures, I won’t talk on this long, but it was now a fast paced race to learn as much as I could, in terms of hardware, software, and engineering. I started realizing that the Pi’s strength was it’s flexibility… that it worked well in conjunction with other Pi’s. That there was a world of aftermarket support allowing you to realize damn near any project you could imagine. Play the old school fast forward sound. I’d defined what I wanted, and why.
A recovery effort meant planning and execution. That can loosely be defined by what I’d come to know as “operations”. Operations needs intelligence. So it comes down to this: How do we make a portable operations center built around the ISG framework for disaster response?
The answer is that in addition to being a repository of useful information and guides, it has to be able to gather further information, prepare that information, and brief it to those who will be a part of the recovery effort.
Other Designs
In designing the mTOC, I was principally inspired by Jay Doscher’s “Recovery Pi“, which is the direct inspiration. With that said, Doscher’s original design was several years old, and technology that wasn’t available for his original build was available to me. It wasn’t necessary, for example, to mount and wire an internal battery bank (which vary greatly in size, cost, consistency, etc) because small power supplies specifically made for the Pi are now available. Additionally, GPIO pinouts are a pretty esoteric addition from the lay user’s perspective, and these took up valuable space that meant other features couldn’t be used – such as the HDMI ports.
Others had done knockoffs of the Recovery Pi, such as the Division themed Cyberdeck and the O.G.R.E., but in my view, they reflected very different use-cases and desired end states.
Features
Interface
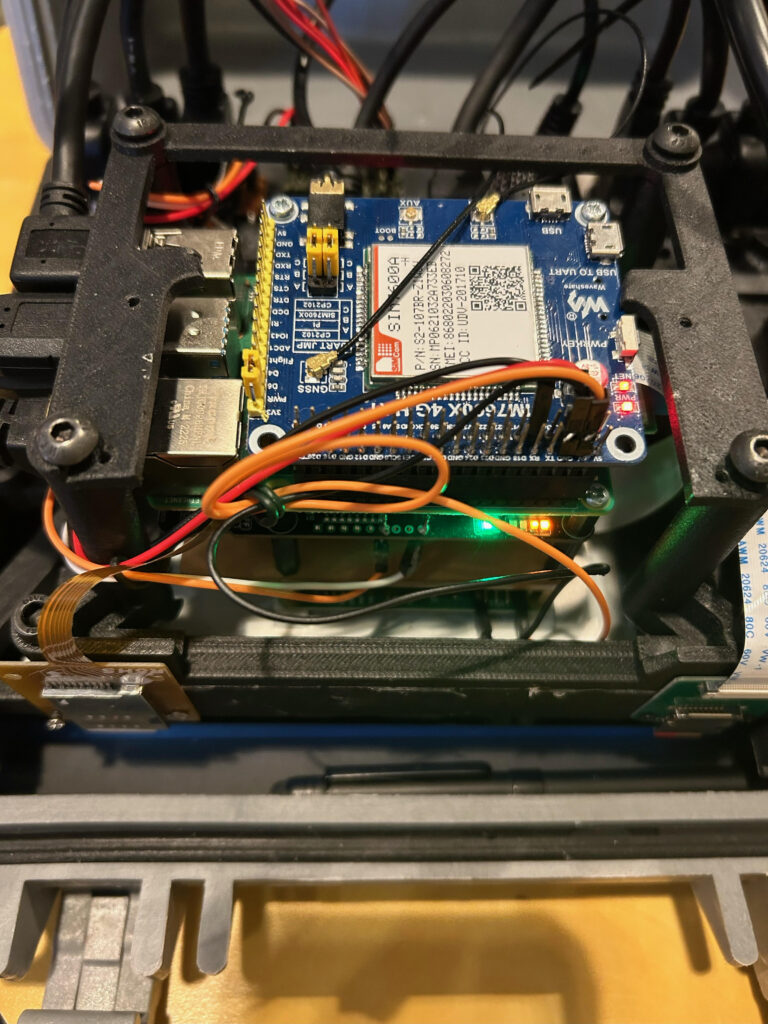
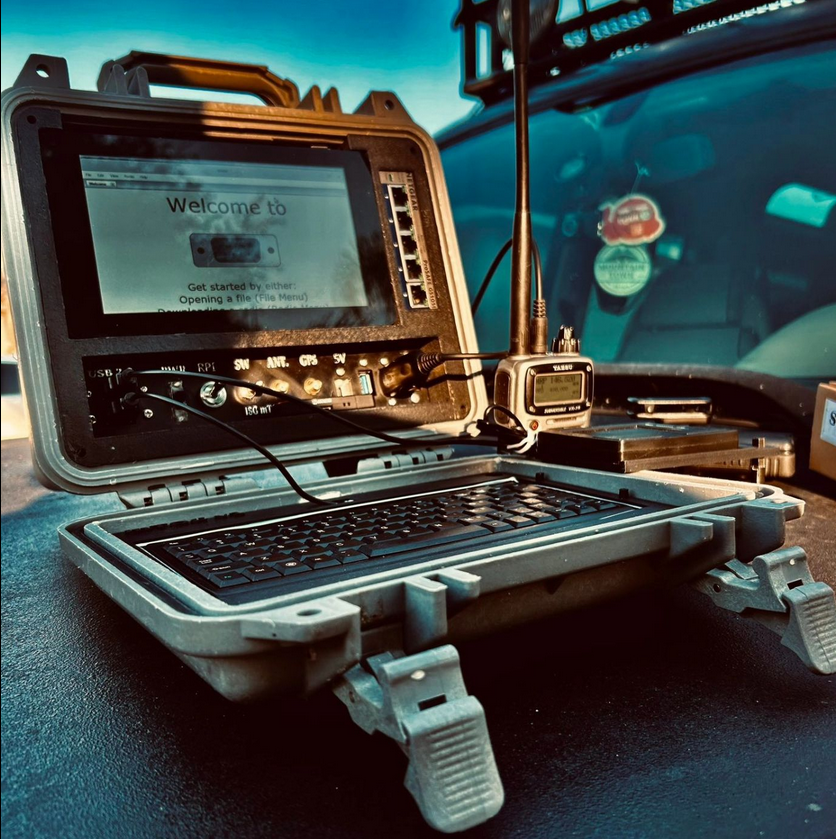
The very first place to start is the layout. The redesign of the original Recovery Pi came with the caveats that I needed a way to extend and run antennas for signal and GPS more than GPIO. Additionally, wiring the display to it’s own power seemed like an extra step when the screen can be timed out or powered down if you only need the switch. Along the way, I found that even with a wired power switch and power supply, this only shut down the operating system, and that the power supply remained on! This meant there was a slow battery drain that would consume power even with the unit ‘off’. So I created a master power switch and a Raspberry Pi operating switch, and wrote a script to listen for a state change on GPIO pin 3 that would call the system to “wake up” if it was powered down, or send the “sudo shutdown now” command if it was on.
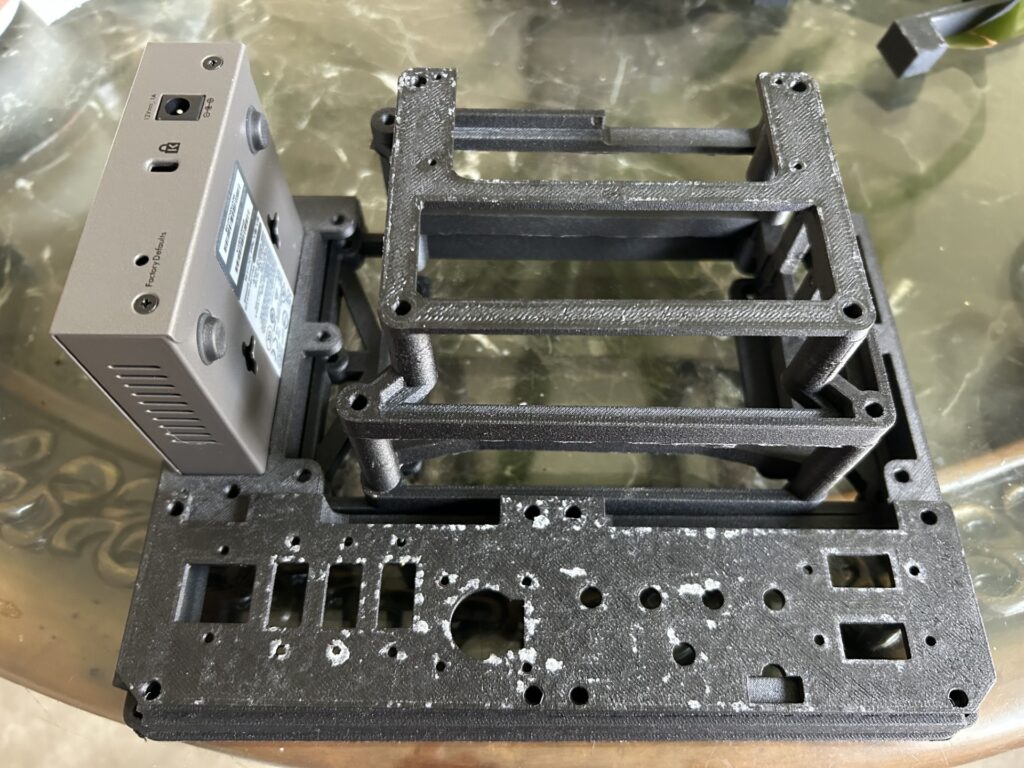
As well, I wanted the user to be able to access ALL the Pi’s ports: aux for sound, HDMI for display or projection, all the USB ports (especially since hardwiring helps security and latency), a LAN port to attach to the switch, an on/off toggle and external power for the network switch (so it doesn’t run off the Pi’s power – which it can do with a USB cable and barrel plug) and a 5 V port to power the unit’s power supply. I spent a few months tinkering, trying new mounting options, tweaking the code, and ultimately finding the project functional.
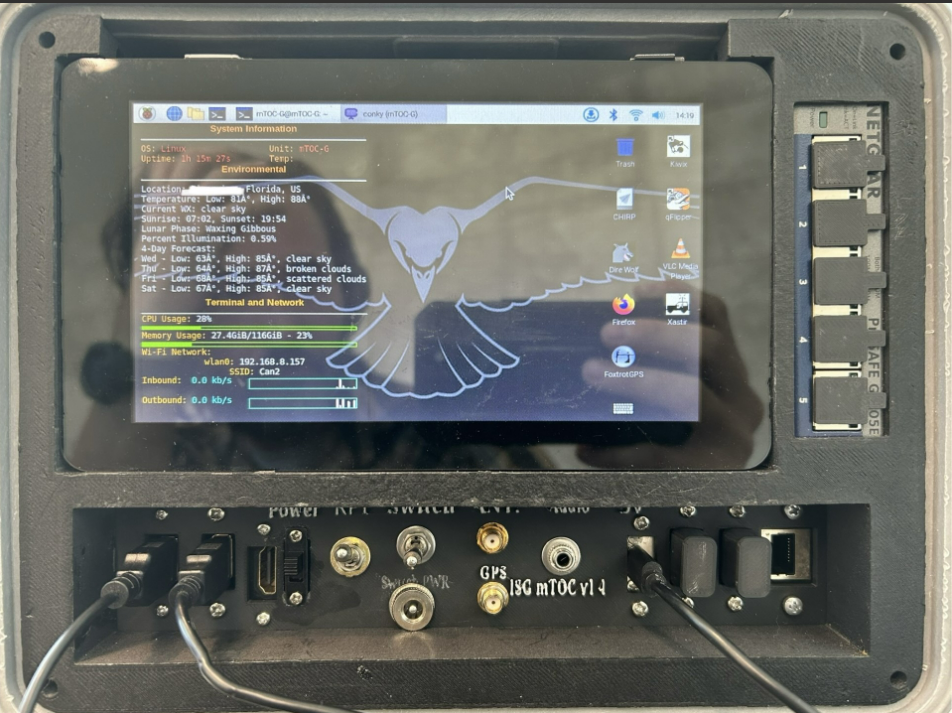
Perhaps the coolest thing about the Pi is the ability to instantly swap operating systems by just swapping the MicroSD card… problem is, normally you’ve got to remove the friction fit chassis from the case to access it, and it’s awkward. To work around this, I mounted MicroSD and SIM extenders and mounted them to the top of the device, making swapping operating systems (important mission specifics) and SIM (important for intelligence) a 30 second process that requires no extra tools.
Power Supply
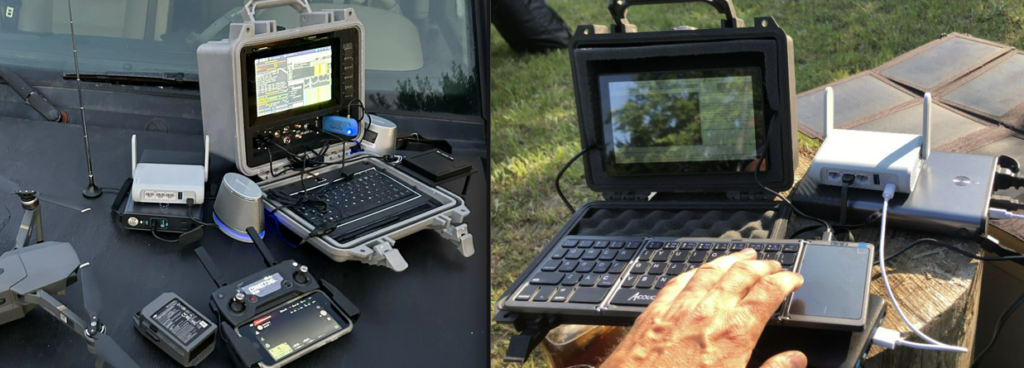
While not everyone is overly concerned with power being a built-in part of the unit, my take is that if the mTOC only works when plugged in, it’s a toy. I need to be able to set this up under a bridge in the wake of a hurricane, send up a drone, compare my findings to the satellite images on FoxtrotGPS, and identify areas which are passable, damaged, or likely to have casualties. At present, we’re getting between 6 and 16 hours of operating time, depending on which accessories are in use, and the device can be recharged by any USB-C charging cable from a battery bank, wall, or solar panel. Power is a non-negotiable requirement for our tech, no different than water for humans. Having the ability to layer the end user’s approach to powering the device provides flexibility in uncertain environments.
Top Hat
While there is a software solution for messaging (APRS via Xastir and Direwolf) it’s technical and not everyone has the appropriate radio. The Sim7600 gives the flexibility of buying a prepaid SIM card, plugging it in, and allowing the mTOC to generate it’s own cellular and 4G internet anywhere you have cellular reception. While many people think of cellular infrastructure as fragile in emergencies, that’s generally not true – depending on what’s going on. There are often brief outages or interruptions, and certainly in the case of war this is true, but for most emergencies, cellular is one of the first priorities in recovery efforts. So while it’s capable of using software/HAM solutions, it also affords the option of cellular service, and is compatible with services like Starlink.
Keyboard/track pad
Perhaps the biggest issue in designing a small deck like the mTOC or Recovery Pi is an adequate keyboard. In addition to requiring additional power/charging, Bluetooth keyboards are likely vectors for attacks, and present a security vulnerability. There are some great designs out that seem like they’d be perfect, until you use them. Between the difficulty of accessing the charging port, latency, and sleep mode, we’ve found that the wired keyboard and touchscreen are a great combination. If you’ve got a decent working surface, the mTOC comes with a stand for a track pad as well as the suggested device, the Perixx peripad. Make no mistake, it’s not going to be as comfortable as a full sized keyboard, but it is functional.
An additional word on this: at present there isn’t a great option to cover and protect the keyboard. This is something I’m looking into fixing.
Switch
Kiwix is a game changer for off-line repositories. It converts webpages to .zim files, makes them readable offline, and can turn your Raspberry Pi into a server other computers can access to reference this material. Not only that, it has everything from “where there is no doctor” to “wikipedia” (yes, all of it, with pictures). While we don’t necessarily want the mTOC to just work as a server (and it’s not set up as an image that would facilitate that), we can use Kiwix as a zim reader and keep those files on standby, either on another device, or on a removable storage medium.
The switch also allows us to take data and information gathered and generated on the mTOC and move it to more capable devices if those arrive.
Part II: Operating System and Software
Linux isn’t really an operating system. It’s a Kernel, and it has various distributions that are created and distributed for free. This allows for a vast array of possibilities, but it also moves at the speed of the demand. That means if you’re looking to use something newer, it might not be supported yet, and if you’re running something older, it might be in history’s dustbin already. It can be tricky, so the route I took with this build was Raspberry Pi OS. Initially, I ran into issues running FoxtrotGPS, or interfacing Bluetooth devices (which turns out to be something of a security vulnerability anyway) on ParrotOS, and so I stuck to the tried and true.
Another thing I’d noticed was “bloat” with software. Sometimes, there are more options than the end user needs, and with Linux, almost everything is free and easy to install. The approach for the software reflected the mTOC’s purpose: a simple heads-up display that uses IP address to give some instant environmental data by way of Conky, and simple, useful tools for gathering information, planning, and presenting the findings.
- Libre Suite (Word processing, spreadsheets, presentation software)
- Mozilla Firefox
- Kiwix
- FoxtrotGPS
- VLC Media Player
- Xastir/Direwolf
- Chirp
- QFlipper
- CubicSDR multi-device Software Defined Radio application (very user friendly)
- NGINX (web hosting for drone feed)
- Syncthing (Platform agnostic file sharing system – allows images taken on cell phones or cameras to upload them to a web based server for recon and planning)
- Dump1090 Aircraft Tracker
- Aircrack-ng
- Pentesting Tools
- Networking tools
Ancillary Equipment
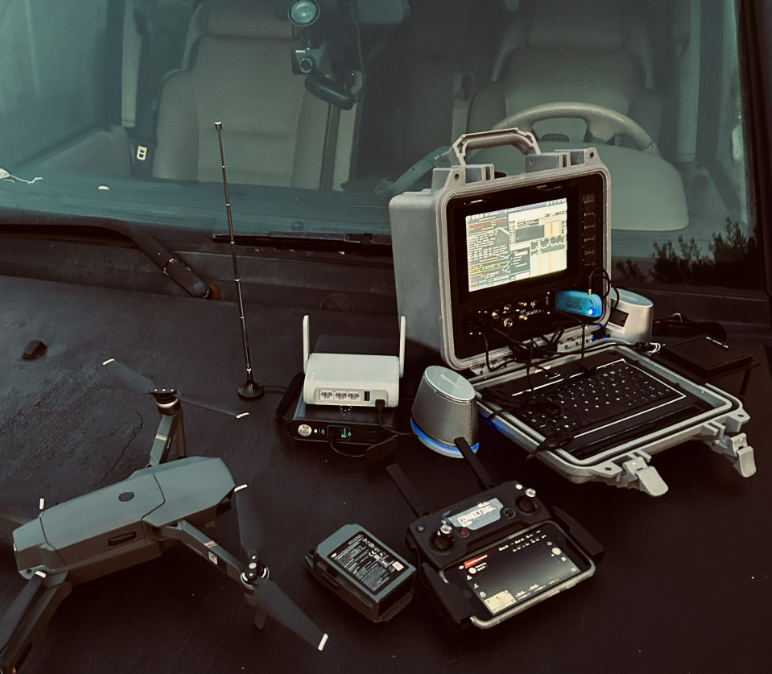
While the mTOC is a pretty capable device as a stand-alone, it REALLY begins to shine when you allow it to branch out. The most significant features being:
- Drone/Drone Feed
- Kodak Luma 350 Projector (for planning and briefing)
- HAM Radio Support
- Supplemental Pi’s and their Operating Systems
It’s hard to express the importance of something as simple as being able to transfer files without access to the cloud, or project an image of a map onto a wall in an abandoned hotel to plan a relief effort… especially if you’ve had to pencil whip this stuff with a “rite in the rain” notepad off a verbal.
Going forward, I hope that people will see the value of this device and see it’s potential for scalability, planning, and facilitating the intelligence cycle. While we will build and offer these for customers, we know fully well that you can tinker your way to something similar, and that we’re following in the open-source footsteps of people like Jay Doscher, and so we’ll provide the STL files free. Likewise, we can print the components to order if you just lack the 3D printer, and that can be customized to some degree. With that said, we STRONGLY encourage using the Pelican cases, as they’re truly more stable in operation (less articulation), shock resistant and water proof. The full parts list with links is included in the article, and we absolutely encourage people to build their own from scratch.
Cheers,
Aaron
